Wednesday, December 28, 2011

Dutch Apple Pie


I'm going to level with you. It should not have taken me this long to post this pie recipe. I've made it four times over the holiday season. And yes, that may be excessive, but once you try this pie you'll understand. Perhaps you'll understand the delay in posting too, because with pie this delicious, there is no time for pictures.

I cannot describe to you how incredibly wonderful and, dare I say, life-changing this pie is. It is my new favorite pie. That's a pretty big honor to bestow. Seriously, listen to me, you must make this pie.

The filling is wonderful in its simplicity. The juice from the apples is used to make the sauce which is not overly sweet, but very creamy with a slight caramel-apple flavor. The struesel on top is crumbly and sweet and compliments the filling in all the right ways.

Mmmmm.

I think I'm going to go eat another piece. Excuse me please.

Dutch Apple Pie
adapted from Handle the Heat

makes one 9 inch pie


For the Filling:
5 large Granny Smith apples
4 large Fuji or McIntosh apples
1/4 cup granulated sugar
1/2 teaspoon ground cinnamon
1/8 teaspoon salt
5 tablespoons unsalted butter
1/2 cup heavy cream

For the Streusel Topping:
1 1/4 cups all-purpose flour
1/3 cup packed light brown sugar
1/3 cup granulated sugar
1 tablespoon cornmeal
pinch of salt
7 tablespoons unsalted butter, melted


Preheat oven to 425.

For the apple filling:
Peel, quarter, and core the apples; slice each quarter crosswise into 1/4-inch thick pieces. Toss the apples, sugar, cinnamon, and salt in a large bowl to combine. Heat the butter in a large saucepan over high heat until foaming subsides; add the apples and toss to coat. Reduce the heat to medium-high and cook, covered and stirring occasionally, until the Granny Smith apple pieces are tender and the Fuji apple slices are softened and beginning to break down, about 10 minutes.


Set a large colander over the large bowl; transfer the cooked apples to the colander. Shake the colander and toss the apples to drain off as much juice as possible. Bring the drained juice and the cream to a boil in the now-empty Dutch oven over high heat; cook, stirring occasionally, until thickened and a wooden spoon leaves a trail in the mixture, about 5 minutes. Transfer the apples to the pre-baked pie shell, pour reduced juice mixture over and smooth with a rubber spatula.


For the streusel topping:

Combine the flour, sugars, cornmeal, and salt in a medium bowl; drizzle with the melted butter and toss with a fork until the mixture is evenly moistened and forms many large chunks with pea-size pieces mixed throughout. Line a rimmed baking sheet with parchment paper and spread the streusel in an even layer on the paper. Bake until golden brown, about 5 minutes; cool the baking sheet on a wire rack until cool enough to handle, about 5 minutes.


To finish:

Sprinkle the streusel evenly over the pie filling. Set the pie plate on the now-empty baking sheet and bake until the streusel topping is a deep golden brown, about 10 minutes. Cool on a wire rack to room temperature and serve.

Tuesday, December 27, 2011

Gingerbread Cookies

Is it too late for gingerbread cookies? Say it isn't so.

Fine, I'm going to say it isn't so. In fact, I might just bake up another batch of star shaped gingerbread cookies to ring in the glorious new year. I think you should too. Because gingerbread is delicious.

I spent years making really bad gingerbread, because it was the only recipe I had. The dough used way too much flour and was ridiculously hard to work with. The gingerbread cookies turned out so-so, but they were such a pain to make. And gingerbread houses with the old recipe? Forget about it.

This one is a winner though. The dough is very easy to work with and the cookies come out perfect every time (even when I roll the dough a little too thick or too thin). I hate to limit gingerbread to just Christmas so I like to cut out stars for New Years and hearts for Valentine's Day, and sometimes just circles for any day. It's just the best with a cup of tea (or coffee if you're into that sort of thing) especially during these cold months.

Gingerbread Cutout Cookies
adapted from Taste of Home Treasury of Christmas Recipes

makes about 3 dozen cookies (depending on size)

2/3 cup shortening
1 cup sugar
1 large egg
1/4 cup molasses
2 cups all-purpose flour
1 tsp. baking soda
1 tsp. salt
1 tsp. ground cinnamon
1 tsp. ground cloves
1 tsp. ground ginger
1/4 tsp. ground nutmeg

 In a large mixing bowl, cream shortening and sugar. Beat in egg and molasses until well combined. In a separate bowl, whisk together dry ingredients. Gradually add to creamed mixture on low speed and mix well. Cover dough with plastic wrap and refrigerate for 2 hours (or up to 24 hours).

When ready to bake, preheat oven to 350. On a lightly floured surface, roll out dough to 1/4 inch thickness and cut into desired shapes, reworking the scraps until all dough is used. Bake for 8-10 minutes, until edges are slightly browned.

Allow to cool for 5 minutes before moving to wire racks to cool completely. Frost if desired.

Thursday, December 22, 2011

Buttermilk Pancakes

Who has two thumbs and loves a big stack of fluffy pancakes?

This girl.

I've tried many different pancake recipes over the years and this is the end all recipe. They come out perfect and fluffy every time, and are a billion times better than the Bisquick variety. They fill you up a lot better too!

This recipe makes enough for two people, but is very easily doubled or tripled for when guests are staying for the holidays. This is our Christmas morning breakfast for sure. Probably with some fruit salad and bacon of course, because what is breakfast without bacon?

Do you have a special Christmas morning meal?

Buttermilk Pancakes
adapted from Cooks Illstrated Cooking for Two - 2009

1 cup all-purpose flour
1 Tbs. sugar
1/2 tsp. baking powder
1/4 tsp. baking soda
1/4 tsp. salt
1 cup buttermilk
1 large egg
2 Tbs. sour cream
2 Tbs. butter, melted and cooled

In a medium bowl, whisk together flour, sugar, baking powder, baking soda and salt. In a separate bowl whisk together buttermilk, egg, sour cream and melted butter. Pour into dry ingredients and fold with a spatula just until combined. Let batter rest for ten minutes.

Heat a large skillet or griddle over medium heat. Spray with Pam. Pour batter onto hot griddle using 1/4 cup of batter per pancake. Cook until edges start to set and air bubbles rise throughout pancakes, about 2 minutes. Flip and continue to cook for an additional 1-2 minutes, until golden brown.

Keep warm in an oven safe dish with oven set at 225 while the rest of the pancakes cook. Serve with butter and maple syrup.

Wednesday, December 21, 2011

Milk Chocolate Fudge

I was going to make some white chocolate fudge this week, because it is just about my favorite thing in the whole wide world. I was getting all jazzed about it and telling the hubby about it when he blurts out that he doesn't like white chocolate fudge that much! He tells me he likes milk chocolate fudge way more and tries to persuade me away from my original plan.

Well, looks like it's his lucky day, because when I found out I was fresh out of white chocolate out of the goodness of my heart, I had no choice! Merry Christmas to you my dear.

I was a little worried when I had to tweak the recipe to fit a different type of chocolate, but it turned out beautifully. And I am always glad to have another fudge recipe that doesn't require a candy thermometer (because I broke mine, again). It's no white chocolate, but it'll do.


Milk Chocolate Fudge
makes 64 - one inch pieces

2 1/4 cups sugar
1 can (12 oz.) evaporated milk
2 Tbs. cornsyrup
1 tsp. salt
12 oz. semi-sweet chocolate chips
1/4 cup (1/2 stick) unsalted butter
1 tsp. vanilla extract

 Liberally butter an 8 inch by 8 inch square baking pan.

In a heavy saucepan, heat sugar, milk, cornsyrup and salt over medium-high heat. Bring to boil and cook for 8-10 minutes. Off the heat stir in butter, extract and chocolate chips, stirring vigorously until completely incorporated.

Pour fudge into prepared pan and smooth top with a rubber spatula. Allow to cool to room temperature before cutting into squares. Store in an airtight container at room temperature for up to 2 weeks.


Monday, December 19, 2011

Creamy Tomato Pasta

Have I told you how much I love pasta?

The answer is a lot. I would say it borders on obsession. I could not live without it.

This recipe from Cooks Illustrated is relatively new to our menu, and I can't for the life of me figure out why. For some reason this recipe has been overlooked again and again as I've made literally every other pasta dish from the Best Ever Recipes magazine.

And although this dish is relatively simple, it is not to be overlooked. I've already made it twice this month, and the hubby and I are obsessed with it. It's bright and flavorful because of the sun dried tomatoes but still has that creaminess that puts a good pasta dish over the top. Sprinkle it with a little sea salt to finish and it is to die for. Seriously.

Creamy Tomato Pasta
adapted from Cooks Illustrated: Best Ever Recipes (2009)
serves 4-6

 3 Tbs. unsalted butter
1 oz. bacon, cooked and chopped
1 small onion, minced (about 3/4 cup)
1 bay leaf
Pinch of red pepper flakes
1/4 tsp. salt
3 garlic cloves, minced
2 Tbs. tomato paste
3 Tbs. oil-packed sun-dried tomatoes, drained, rinsed, patted dry and chopped
1/4 cup plus 2 Tbs. white wine
2 cups plus 2 Tbs. crushed tomatoes
1 lb. short tubular pasta
1/2 cup heavy cream
 1/4 cup chopped fresh basil
Freshly Ground Pepper
Sea Salt
Freshly grated Parmesan

Melt the butter in a medium saucepan over medium heat. Add bacon, onion, bay leaf, red pepper and salt; cook stirring occasionally until onion is very soft and golden, about 8-12 minutes. Increase heat to medium-high, add garlic and cook until fragrant, about 30 seconds. Stir in the tomato paste and sun-dried tomatoes and cook, stirring constantly for 1-2 minutes. Add 1/4 cup white wine and cook, stirring frequently, until evaporated, about 1-2 minutes.

Add 2 cups crushed tomatoes and bring to a simmer. Reduce heat to low, partially cover, and cook, stirring occasionally until the sauce is thickened (a spoon will leave a trail), about 20-25 minutes.

Meanwhile cook pasta until al dente in a large pot of salted water. Drain, reserving 1/2 cup of the cooking water.

Remove the bay leaf from the sauce. Stir in cream, remaining 2 Tbs. wine and remaining 2 Tbs. crushed tomatoes and season with salt and pepper to taste. Add the sauce to the pot of cooked pasta, thinning with cooking water if necessary. Stir in the basil.

Finish with a sprinkle of sea salt and freshly grated Parmesan.


Sunday, December 18, 2011

Cranberry Scones

So it has come to my attention that we cannot live on cookies and candy alone this holiday season. (I tried and probably would have succeeded, but the hubby decided he needed real, non-cookie food for breakfast this morning. Fine.)

Therefore, I give you breakfast.

I am quite taken aback to find that I haven't posted this recipe yet. It is a breakfast regular around this house (and the apartment before that, and the one room studio before that). The hubby has stated that these scones are his favorite breakfast food, and I must say he does request them quite frequently, so there must be some truth to his proclaimed love.

And I can see why he loves them so much. Crisp and sugar-coated on the outside, soft and cranberry studded on the inside, what's not to love? They are super delicious, super easy and take about 20 minutes from start to finish.

Not to mention I feel especially British when I'm pulling a batch of fresh scones from the oven.

It's the little things.

Cranberry Scones
adapted from Taste of Home Annual Recipes - 2000
makes 8 large scones

2 cups all-purpose flour
2 Tbs. sugar, plus more for sprinkling
2 tsp. baking powder
1/2 tsp. baking soda
1/2 tsp. salt
1/2 tsp. ground nutmeg
1/2 cup (1 stick) unsalted butter, cold
3/4 cup buttermilk
1 cup dried cranberries

 Preheat oven to 425. Liberally butter a baking sheet (or pizza pan).

In a bowl, whisk together flour, sugar, baking powder, baking soda, salt and ground nutmeg. Cut in butter with a pastry cutter until pea-size lumps form. Stir in buttermilk and cranberries until dough forms a ball.

Turn dough onto a lightly floured surface and gently knead 6-8 times. Form dough into an 8 inch circle. Cut into 8 wedges. Place wedges on baking sheet, at least 1 inch apart. Sprinkle with sugar.

Bake for 12-15 minutes, until lightly browned. Cool on wire racks.


Saturday, December 17, 2011

Candy Cane Cookies


I've been very excited to post this recipe. It's an old family recipe that I used to make with my Nana every year. They bring back great memories and make the house smell like Christmas.

This is, in my opinion, the perfect Santa cookie. You ought to make them pretty close to Christmas Eve, not because they won't keep, but because, well, how much self control do you have? Don't answer that. I know my answer to that question...and it isn't pretty.

Hence I have saved half the dough for baking later in the week.

These are a bit time consuming, but they are lots of fun to make with friends or with kids. Shaping the dough into candy canes is the fun part anyway! And how cute are these as an addition to your cookie tins? Let's face it, they are a Christmas must. (At least they are at our house!)

Candy Cane Cookies
makes about 4 dozen

1 cup butter, room temperature
1 cup confectioners sugar
1 large egg
1 1/2 tsp. almond extract
1 tsp. vanilla extract
2 1/2 cups all-purpose flour
1 tsp. salt
1 tsp. red food coloring
1/4 cup crushed candy canes
1/4 cup granulated sugar

Preheat oven to 375. Combine crushed candy canes and granulated sugar in a small bowl, set aside.

In a large bowl cream butter and sugar on medium speed until smooth. Beat in egg and extracts until well combined. Reduce speed to low, gradually mix in flour and salt until a fairly stiff dough forms.

Divide dough in half, color one potion of dough with food coloring. Using about 1 tsp. of dough per side, roll one piece of each color into a rope and twist together to form a candy cane shape.

Bake for 10-12 minutes, until edges are lightly browned. Immediately sprinkle sugar mixture over hot cookies. Allow to cool for 5 minutes before removing to wire racks to cool completely.


Friday, December 16, 2011

Peppermint Meringues

Don't these just look like Christmas? I love these peppermint meringues. They are light and airy and oh so festive.

Honestly, I love any sort of peppermint treat, especially during the holidays. When I was little, my favorite part of going to see Santa was the mini candy cane they give you after you get your picture taken.

I especially love this recipe because it is so easy, it makes a ton of meringues (great for gifting!), and it only has five ingredients.You should definitely consider adding these to your Christmas treat list. They make a very pretty addition to any cookie tin.

Peppermint Meringues
makes about 5 dozen

4 egg whites 
1/4 tsp. salt
1/4 tsp. cream of tartar
1 cup sugar 
3-4 crushed candy canes 

 Preheat oven to 225. Line two baking sheets with foil.

In the bowl of a stand mixer fitted with the whisk attachment, whisk egg whites on medium-low until foamy. Add salt and cream of tartar and whisk until soft peaks form. Gradually add sugar and whisk on high speed until stiff, glossy peaks form.

Drop by teaspoonfuls onto foil lined baking sheets (you can also pipe the meringues with a start tip like I did). Sprinkle with crushed candy canes. Bake for 1½ hours. Peel away from foil and store in an airtight container.


Wednesday, December 14, 2011

Chocolate-Ginger Brownies

It is no secret that I love brownies. It has been this way for as long as I can remember. To increase your understanding of my love for brownies here is an actual conversation that took place in middle school (following our conversation about my recent break-up with Jimmy Diekmann):

Me: I ate an entire tray of brownies yesterday. 

Becky: Gemma, oh my God...

Nicole: (interjecting) She was SAD!

Me: No, I just really, really like brownies.

True story. Ask either of them.

So anyhow, I have been married to one recipe (which I will certainly share at some point or another) for quite a while. But, not long ago, I decided to break tradition and try a new brownie recipe (gasp!). And you know what, it was pretty darn good. I'm not about to abandon my tried and true recipe, but it was a nice change of pace.

The ginger in these brownies is what really sets them apart. They have undertones of spice cake, which I love. They are very fudgy but still have that nice crisped chocolate layer on top. Pretty wonderful. It's also a great recipe because everything comes together in the saucepan you use to melt the chocolate. Minimal dishes? Yes, please.

So if you're feeling adventurous with your brownies this holiday season, try these!

Ginger Brownies
adapted  from Martha Stewart Cookies

makes 8" square 


½ cup (1 stick) unsalted butter
3 oz. bittersweet chocolate, coarsely chopped
1 cup sugar
2/3 cup all-purpose flour
¼ cup unsweetened cocoa
2 large eggs
1 tsp. grated, peeled fresh ginger
½ tsp. vanilla extract
½ tsp. ground nutmeg
½ tsp. ground ginger
¼ tsp. coarse salt
1/8 tsp. ground cloves

Preheat oven to 325°F. Butter an 8 inch suare baking dish. Line bottom with parchment, allowing 2 inches to hang over two sides. Butter parchment.

Melt butter and chocolate in a medium saucepan over medium-low heat, stirring until smooth. Remove from heat, and stir in remaining ingredients. 

Pour batter into prepared dish and smooth top with spatula. Bake until a cake tester inserted near the middle comes out with moist crumbs, about 30-35 minutes. Let cool for 15 minutes before removing parchment sling and cooling on wire rack.

Tuesday, December 13, 2011

Yellow Buttermilk Cupcakes with Fluffly Vanilla Frosting

This is the ultimate birthday cupcake. When the hubby and I were taste testing we came to the consensus that between the fluffy vanilla frosting and dense yellow cake "it seriously tastes like birthday."And yes, this is a double recipe day, cupcakes and a frosting recipe.

Luke's birthday party was actually the first time I have ever made yellow cupcakes. Isn't that out of this world? I'm a chocolate cupcake girl all the way, but still, who hasn't made yellow cupcakes?

Luckily for me, they turned out divine (just like everything from Martha Stewart's Cupcakes). I'm still a chocolate lover, but that won't stop me from finishing off the yellow cake birthday leftovers. They are seriously delish.

 And by the way, I think I've got a yellow cake lover on my hands. Lucas ate all the frosting and sprinkles but hardly touched his chocolate cake. I gave him one of these yellow cupcakes on his real birthday and it was demolished.

Yellow Buttermilk Cupcakes
makes 3 dozen


3 cups cake flour
1 ½ cups all-purpose flour
¾ tsp. baking soda
2 ¼ tsp. baking powder
1 ½ tsp. coarse salt
1 cup plus 2 Tbs. (2 ¼ sticks) unsalted butter, room temperature
2 ¼ cups sugar
5 large whole eggs plus 3 large egg yolks, room temperature
2 cups buttermilk, room temperature
2 tsp. vanilla extract

Preheat oven to 350. Line standard muffin tins with liners. Whisk together flour, baking soda, baking powder and salt.

Beat the butter and sugar in a large bowl on medium-high speed until pale and fluffy. Reduce speed to medium and add eggs, one at a time, beating well after each addition. Add the egg yolks and beat until thoroughly combined. Add flour mixture in three additions, alternating with two additions of buttermilk, beating until combined after each. Beat in vanilla.

Divide batter evenly among lined cups, filling each about three-quarters full. Bake for about 20 minutes, until a cake tester inserted in the center of the cake comes out clean. Cool for ten minutes in the pan, then remove to wire racks to cool completely. Frost cupcakes with an offset spatula. Decorate with sprinkles if desired.

Fluffy Vanilla Frosting
makes about 4 cups

1 ½ cups (3 sticks) unsalted butter, room temperature
4 cups (1 lb.) confectioners’ sugar, sifted
¾ tsp. vanilla extract

Beat butter on medium until pale and creamy. Add confectioners' sugar, ½ cup at a time, beating until well combined. After each two additions, increase speed to high and mix for 30 seconds. Once all the sugar is incorporated, beat in vanilla.

My Baby is One

Somehow a whole year has gone by since my beautiful Lucas came into the world. If you find out where the time went, would you let me know? I'd very much like it back.

I will probably post cupcake recipes and party decor later this week, but today is for Lucas. This is my dedication to my biggest love and his first year in the world.

I remember the day you were born like it was yesterday. It was exciting and scary and painful and wonderful, in that order. I remember the awe of staring at you in those first few weeks, that overwhelming awe of knowing that we made you, that you were alive and ours. It is still surreal.

Before you were born I wondered what you would be like. I wondered if you would look like you did in my dreams. (You did.) I wondered what kind of person you would be. I wondered what the world would be like once you arrived. Now I know.


You are kind. 
You are sweet.
  You are loving. 
You are a lover of food and cooking. 
You are a lover of animals.
(especially your dog and cat)
You are a snuggle bug.
You are filled with joy and music. 
You are a songbird and a dancer. 
You are adventurous and outdoorsy. 
You are unafraid. 
You are determined and single-minded. 
 You are a jokester, my funnyman.
You are stubborn. 
You are strong. 
You are independent.
You are curious.
You are happy.
You are pure.
You are filled with thoughts and ideas.
You are smart, too smart my dear.
You are perfect.

And I still wonder about many things. I wonder about the things you will say. I wonder about your passions. I wonder about who you will love and the lives you will touch. I wonder about how you will change the world simply by being in it. Simply by being you.

You have changed the world in the best possible way. You have made life much harder but infinitely better.  We are so lucky to have you.

Happy Birthday, my love.


Monday, December 5, 2011

Chicken Vesuvio

After quite the leave of absence, I am back. The whole not having a good camera thing was really bringing the blog down. But thanks to a brand spankin' new DSLR (an early Christmas present from my mommy-in-law, thank you, thank you, thank you!) there will be many more posts (even when I have to take pictures in at night, hooray for dinner food!).

So, lets get down to business. I have been wanting to post this recipe for Chicken Vesuvio since I started blogging. Since it's strictly a dinner dish, however, I was never able to get even a slightly decent picture of the dish. But now, you can actually tell that's chicken on the plate! Yay!

It is my go to recipe for chicken. It's the perfect weeknight meal for two. I almost always have everything I need on hand, it comes together in about 30 minutes and everything cooks in one pan (can I get an amen!). Plus, any meal that smothers my protein, starch and vegetables in a buttery garlic wine sauce is a winner in my book.

I love it. My hubs loves it. You'll love it too.

Chicken Vesuvio
 adapted from Cooks Illustrated Cooking for Two

2 boneless, skinless chicken breasts
salt & pepper
1/4 cup flour
5 tsp. olive oil
3-4 small red potatoes, cut into 1 inch chunks
1 garlic clove, minced
1/4 tsp oregano
1/4 tsp. salt
1/8 tsp. rosemary
1 cup low sodium chicken broth
1/4 cup white wine
1/2 cup frozen peas, thawed
2 Tbs. unsalted butter
  
Rinse chicken breasts and pat dry. Salt and pepper both sides then dredge in flour, shaking off excess. Heat 1 Tbs. oil in a 10 inch non-stick skillet over medium-high heat. Brown chicken for 6-8 minutes, turning once about halfway through. Transfer chicken to a plate, wipe out pan.

Heat remaining 2 tsp. oil over medium heat. Add potatoes to the skillet, cook until lightly browned, about 7 minutes. Add garlic, rosemary, oregano and salt, cook until fragrant, about 30 seconds. Pour in broth and wine, and nestle the chicken, along with any accumulated, juice in the pan. Reduce heat to medium-low and simmer, covered, for 12-18 minutes, until the chicken registers 165 on an instant read thermometer.

Place chicken on plate, tent loosely with foil. Increase heat to medium and cook, uncovered, until potatoes are tender and sauce is slightly thickened, about 5-7 minutes. Remove potatoes from skillet with a slotted spoon. Add butter and peas, and continue to cook 1-2 minutes. Pour sauce and peas over chicken and potatoes. Serve.

Friday, November 4, 2011

Cheddar Beer Quick Bread


Don't you just love a good quick bread? While I enjoy the process of bread making, it is time-consuming and ties you to the house for the better part of the day. Quick breads on the other hand require minimal effort and are ready in about an hour or two.

This recipe in particular is especially wonderful. In fact, I think it's my new favorite quick bread. It's hearty and filling. The beer and cheese flavor really shines. It gave me a good excuse to do something with the leftover Coors Light in my refrigerator (because c'mon people, that stuff isn't suitable for drinking). It has the most fabulous golden crust with the little bits of lightly browned cheddar here and there (and seriously, don't we all love crunchy cheese?). Oh, and did I mention it is ready in under an hour? Super score.

I would recommend using a more delicious beer than Coors Light. I think using a darker beer would really bring out the flavors more. But hey, if all you've got is cheap nasty beer, it'll do.

Cheddar Beer Quick Bread
adapted from Annie’s Eats

Ingredients:
2 cups all-purpose flour
1 cup whole wheat flour
1/3 cup packed brown sugar
4 ½ tsp. baking powder
1 tsp. salt
1 tsp. garlic powder
1½ cups shredded sharp cheddar
12 oz. beer
2 tbsp. butter, melted

Directions:
Preheat oven to 350°.  Lightly grease a 9×5” loaf pan. 

In a large bowl, combine flours, brown sugar, baking powder, salt, and garlic powder.  Whisk to combine well.  Add cheese and whisk to combine.  Slowly add beer to dry ingredients and stir lightly until just combined, and all ingredients are completely moistened.  Place into a prepared loaf pan and pour melted butter over the top.  Place in the oven and bake for 45-60 minutes, or until a toothpick inserted in the center comes out clean.

Monday, October 31, 2011

Caramel Apples

Happy Halloween Dearies!
An apple for you, my dear...no poison, I swear.

Trick or Treating time is almost here! Then the holidays will really sneak up on us! Thanksgiving and Christmas, my dear baby boy's birthday in the middle of it all. It makes my head spin to think about it!

I hope you all had a fun Halloween weekend.
(because we certainly did)

Every day we shufflin

 Our annual pumpkin carving party was last night, and it was loads of fun as always. Uncle Mike even made a death star pumpkin to go with Lucas' Darth Vader costume. It was awesome. And of course, there was lots of great food including these delicious caramel apples, courtesy of Annie's Eats, my favorite food blog.

I've always been a little wary of making my own caramel, but I am afraid no more. These caramel apples were so incredibly good that I'm sure I'll be making them for many occasions. I will go out of my way to find an excuse to makes these again. Caramel apples are, after all, one of my favorite treats. If you've been afraid of candy making in the past, I urge you to face that fear. These are worth it. Promise.

Caramel Apples
adapted from Annie's Eats

makes 10-12 small apples

8 tbsp. unsalted butter
2 cups packed brown sugar
1 cup light corn syrup
Pinch of salt
1 (14 oz.) can sweetened condensed milk
1 tsp. vanilla extract
10-12 small Granny Smith apples, stems removed
10-12 wooden dowels or lollipop sticks

Directions:

Melt the butter over medium heat in a medium, heavy-bottomed saucepan (This is very important, I used a saucepan without a heavy bottom and had to start all over again because the caramel burned almost instantly). Mix in the brown sugar, corn syrup and salt.  Cook the mixture, stirring occasionally, until it comes to a boil.  Stir in the condensed milk.  Cook and stir until a candy or instant-read thermometer reads 248° F (firm ball stage.)  Remove from the heat and stir in the vanilla.

Insert a lollipop stick or thin wooden dowel (or a trimmed skewer, if you're like me) into the bottom of each apple so that it is firmly in place.  Dip the apples one at a time into the caramel mixture, turning slowly to coat evenly.  Transfer to a baking sheet lined with wax paper and allow the caramel to set.  Decorate as desired, with melted chocolate, chopped nuts, or candy pieces. (I'm partial to the traditional myself)


Friday, October 28, 2011

Frightening Fingers

These spooky fingers are on my Halloween spread every year. They're so fun, festive and easy to make. Everyone always gets a kick out of the oozing blood. They taste great too. What's not to love?

Okay, I'll admit, my fingers have a little "more to love" than they should. I don't know why I never learn to make skinnier fingers. Every year I end up with chubby witch fingers and promise I'll remember not to make them so darn fat next year.

Well, there's always next year. . .

Frightening Fingers
adapted from Taste of Home Holidays & Celebrations Cookbook (2001)

makes 4-5 dozen

1 cup butter, softened
1 cup confectioners sugar
1 large egg
1 tsp. vanilla extract
1 tsp. almond extract
2 3/4 cups flour
1 tsp. baking powder
1 tsp. salt
raspberry or strawberry jam (preferably seedless)
1/4 cup sliced almonds

In a large bowl, beat butter and sugar until light and fluffy. Beat in egg and extract until well combined. In another bowl combine flour, baking powder and salt. Gradually add to creamed mixture. Refridgerate dough for 1 hour, or until easy to handle.

Form dough into skinny fingers using your hands. Using the flat end of a butter knife make an indentation in the top of each finger for the nail bed. Cut three slit in the middle of each finger for the knuckles. Place on lined baking sheets about 1 inch apart. Bake at 325 for 20-25 minutes, until edges are golden.

Remove to wire racks to cool for five minutes. Take 1/8 tsp. jam and spread into nail bed. Wedge an almond slice into the jam, allowing the excess to ooze over the edges. Cool completely.

Thursday, October 27, 2011

Kisses for my Hubby

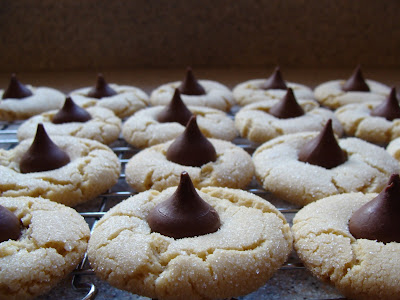
My husband is a bit of a dessert fanatic. If you asked him to pick a favorite I'm sure he'd bounce around ideas, finally saying he doesn't know. He has many favorites, but in my heart of hearts, I know that these Almond Kiss cookies are his true favorite. Every time we walk down the candy isle in Walmart, he looks longingly at the Hershey's Kisses and reminds me of "those cookies I used to make."

Maybe it's because they remind him of high school, when I used to bring these cookies to class with me. Maybe it's simply because they are truly delicious.Whatever his reason, I'm glad to have an excuse to make these cute little kiss cookies for him whenever the mood strikes me.

So eat your heart out hubby. You can have all the kisses I've got.

Almond Kiss Cookies
makes 40 cookies

1/2 cup butter, softened
1/2 cup sugar (plus more for rolling
1/2 cup packed brown sugar
1 large egg
1 tsp. almond extract
2 cups flour
1 tsp. baking soda
1/4 tsp. salt
40 milk chocolate kisses (with almonds, optional)

In a large bowl cream butter and sugars until fluffy. Beat in egg and extract until well combined. In another bowl, combine flour, baking soda and salt; gradually add to creamed mixture. Cover and chill for 1 hour or until easy to handle.

Roll dough into 1" balls, then roll in additional sugar. Place cookies 2" apart on an ungreased baking sheet. Bake at 325 for 13-15 minutes, until slightly golden and cracked.


Tuesday, October 25, 2011

Creepcakes!

Halloween is my second favorite holiday of all time. Christmas is first. Thanksgiving is third. But I love kicking things off with Halloween. My good friend Mandy and I always host a pumpkin carving party, and it just gets better every year.

A very attractive shot from the 2008 Pumpkin Carving Party


It is a great tradition. And, as with all great traditions, it comes with an array of special food. In preparation for this year's festivities I've started gathering ideas and trying out exciting new party foods.

Enter these fabulously fun creepcakes!
How fun are those laffy taffy tongues?


These are my trial run, and there were certainly some winners in the bunch (and some very sad looking losers). I'm a big fan of the cyclops with tentacles and the funky little dude with the green tongue. Next time I'm going to do some light green frosting in addition to the dark green and maybe even some orange tint.

I used a basic chocolate cupcake recipe and a fluffy vanilla frosting for these, but you could substitute any number of flavor combinations for them. There are some must have candy items for these but you can use your imagination and whatever happens to be in your halloween candy stash.

Some must haves:

  • Chocolate Chips (regular and miniature)
  • Marshmallows (regular and miniature)
  • Laffy Taffy
  • Round colored candy (M&Ms, Gobstoppers, etc.)
  • Licorice Lace

Your basic step-by-step:

  1. Make your cupcakes, allow to cool completely. (I used regular and mini muffin tins for variety)
  2. Make your frosting, tint with your choice of food coloring (definitely do some light and dark green)
  3.  To make marshmallow eyes: cut a small slit in the top of a marshmallow, insert chocolate chips or colored candy for pupils. Marshmallows can also be sliced in half and have candy placed in center.
  4. To make tongues: flatten out a single piece of laffy taffy using a rolling pin or your hands, leaving the ends rounded. Cut in half and run a knife down the center of each tongue to make an indentation. 
  5. To make tentacles: flatten out laffy taffy and cut into long triangular pieces. Press with your fingers to curve.

Stay tuned for more tricks and treats to come this week!

Couldn't resist adding a picture of my little pumpkin at the pumpkin patch


Related Posts Plugin for WordPress, Blogger...